Replacing exterior bulbs

Check the operation of all the bulbs frequently.
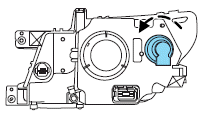
Replacing headlamp bulbs
Check the operation of all bulbs frequently.
1. Make sure that the headlamp control is in the off position.
2. Open the hood.
3. Remove the bulb cover.
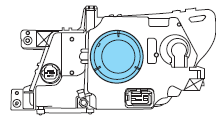
4. Turn the bulb holder counterclockwise and remove it.
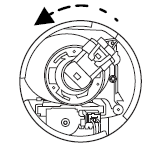
5. Disconnect the electrical connector.
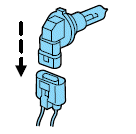
WARNING: Handle a halogen headlamp bulb carefully and keep out of children’s reach. Grasp the bulb only by its plastic base and do not touch the glass. The oil from your hand could cause the bulb to break the next time the headlamps are operated.
6. Reverse the procedure to install the new bulb.
Replacing HID headlamp bulbs (if equipped)
The low beam headlamps on your vehicle use a “high intensity discharge” source. These lamps operate at a high voltage. When the bulb is burned out, the bulb and starter capsule assembly must be replaced by your authorized dealer.
Replacing front parking lamp/turn signal bulbs
1. Make sure the headlamp switch is in the off position, then open the
hood..
2. At the wheel well, remove the
fasteners from the splash shield,
then pull the splash shield back to
gain access to the bulbs.
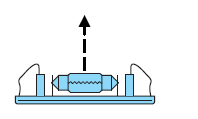
3. Rotate the bulb socket counterclockwise and remove from the lamp assembly.
4. Carefully pull the bulb out of the socket.
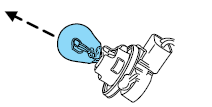
5. Reverse the procedure to install the new bulb.
Replacing side marker bulbs
Your vehicle is equipped with LED side marker bulbs. It is designed to last the life of the vehicle. If replacement is required, see your authorized dealer.
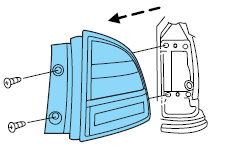
Replacing backup lamp bulbs
The backup lamp bulb is located in the lower portion of the tail lamp assembly. Follow the below steps to replace the bulb.
Note: Your vehicle is equipped with a tail/stop/turn/sidemarker lamp assembly containing integral multiple light emitting diodes (LED). See your authorized dealer for the replacement LED module.
1. Make sure the headlamp switch is
in the off position and then open
the liftgate to expose the lamp
assembly bolts.
2. Remove the two bolts from the
lamp assembly.
3. Carefully remove the lamp
assembly away from the vehicle by
pulling the assembly straight out to
expose the bulb socket. DO NOT
TIP THE LAMP ASSEMBLY SIDEWAYS.
4. Rotate the bulb socket counterclockwise and remove from lamp
assembly.
5. Pull bulb straight out of socket and snap in the new bulb.
6. Install the bulb socket into the lamp assembly and rotate clockwise.
7. Carefully install the tail lamp assembly on the vehicle by securing the
lamp assembly with two bolts.
Replacing supplemental liftgate lamp assembly
Your vehicle is equipped with a liftgate lamp assembly containing integral multiple light emitting diodes (LED). If one or more LEDs burn out, the complete lamp module has to be replaced. See your authorized dealer for the replacement LED module.
Replacing high-mount brake lamp bulbs
Your vehicle is equipped with an LED center high-mount stop lamp. It is designed to last the life of the vehicle. If replacement is required, see your authorized dealer.
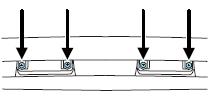
Replacing license plate lamp bulbs
1. Make sure the headlamp switch is
in the off position.
2. Remove the two screws and the
license plate lamp assembly from
the liftgate.
3. Carefully pull the bulb straight out from the lamp assembly.
Install new bulb(s) in reverse order
Replacing fog lamp bulbs
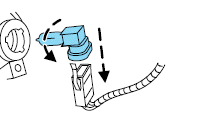
1. Make sure the fog lamp switch is
in the off position.
2. From underneath the vehicle,
remove the splash shield and rotate
the harness/bulb assembly
counterclockwise, to remove from
the fog lamp.
3. Carefully disconnect the bulb
from the harness assembly via the two snap clips.
Install the new bulb in reverse order
See also:
Power side view mirrors
WARNING: Do not adjust the mirror while the vehicle is in
motion.
To adjust your mirrors:
1. Rotate the control clockwise to
adjust the right mirror and rotate
the control counterclock ...
Why maintain your vehicle?
This guide describes the scheduled maintenance required for your
vehicle. Carefully following this schedule helps protect against major
repair expenses resulting from neglect or inadequate mainten ...
Accessory delay
With accessory delay, the window switches, audio system and moon roof
(if equipped) may be used for up to 10 minutes after the ignition is
turned off or until either front door is opened. ...